Experimenting with Physically based rendering in Blender Cycles
by Martin Thomas
Cycles should be OK? …
I’ve been thinking about experimenting with physically based rendering for a long time, but at first I didn’t want to write any code. So I turned to the Blender Cycles path tracer. Cycles is great because it should give the “ground truth” path traced solution, so later I can see how close I got to that. However, simply importing a model doesn’t give you nice results outright, you have to set up the materials. I also read a lot about PBR from mainly here: http://interplayoflight.wordpress.com/2013/12/30/readings-on-physically-based-rendering/
But where do I get PBR assets from?
Physically based rendering is great because it simpifies the asset creation process, and it makes it difficult for the artists to create unrealistic results. It is usually paired with a streamlined asset creation pipeline, with all the reference materials and the like.
But I don’t have these, so I set out to search for PBR assets that one can use without paying artists to create them.
I found this great gun asset here: http://artisaverb.info/PBT.html
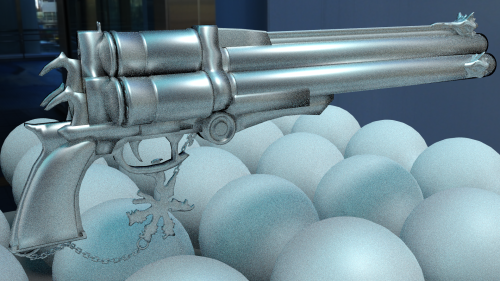
I also used it as reference for rendering results.
There’s not much more assets around the web.
How to achieve fast, clean render output on AMD
Render settings tab:
Resolution: set to desired (1080p)
Sampling: branched path tracing, 4 AA, 8 diffuse, 6 glossy, 4 AO samples, rest is 1 sample (add more if needed)
Light paths: set max samples to 128 for each of them, min to 0
NO motion blur
Performance: dynamic BVH, cache, persistent spatial splits, 256×256 tiles, no progressive
World settings:
Set up an equirectangular background texture for the environment map at the world settings.
http://www.hdrlabs.com/sibl/archive.html
Use importance sampling here.
Lights:
Disable importance sampling for ALL your lights, as they cause “black lines” artifacts.
Cameras:
Use NO depth of field for the camera.
Memory considerations:
OpenCL allows up to 576MB of allocatable Buffer Size (clCreateBuffer) on my 1GB video card, so make sure you don’t go over that!
Reduce texture sizes if needed (I used 2k)
This made sure that on my HD 7770 I got around 40 second render time for a frame. However the image wasn’t at all noise-free. If I set the render settings to the “final” preset with “full global illumination” I got around 5-8 minutes of render time per frame.
With all these optimizations a 1.5 minute movie still took 2 days to render.
Steps to set up PBR in Blender Cycles
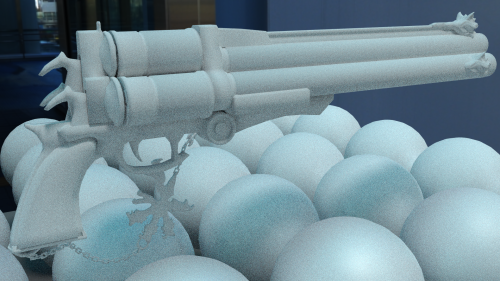
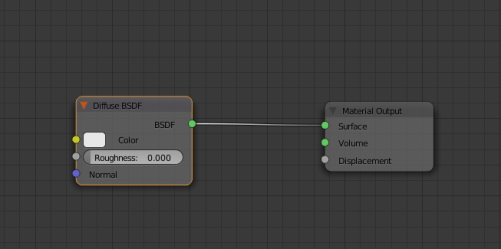
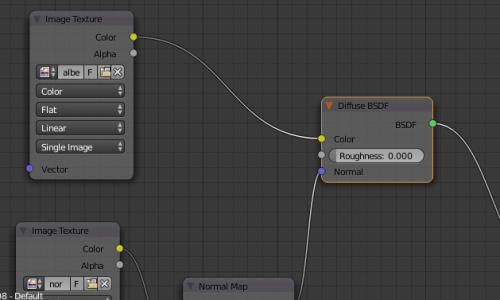
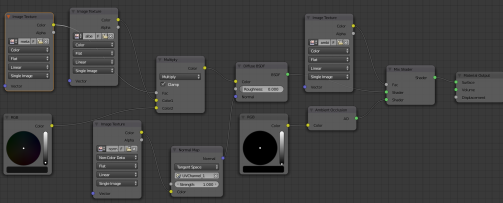
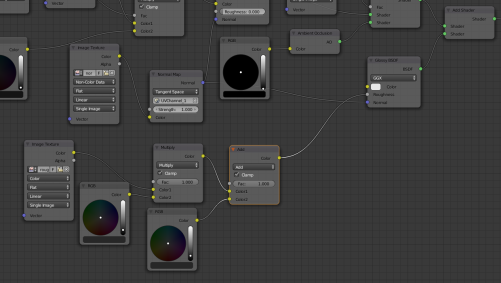
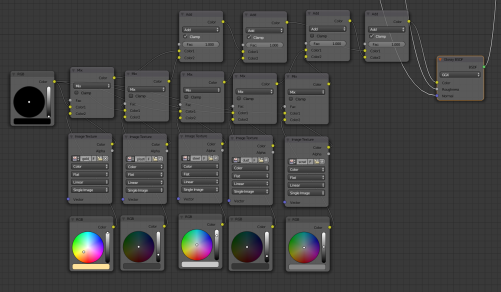
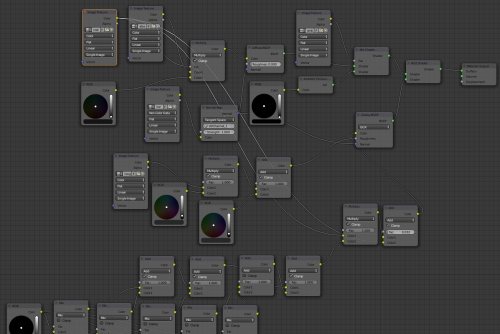
1) add a diffuse shader as seen on the graph image
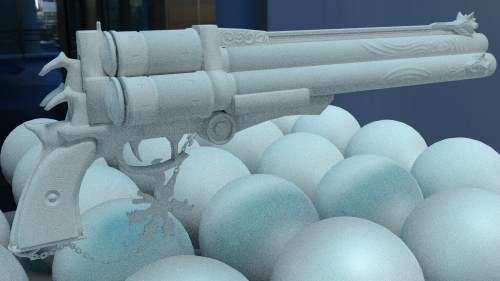
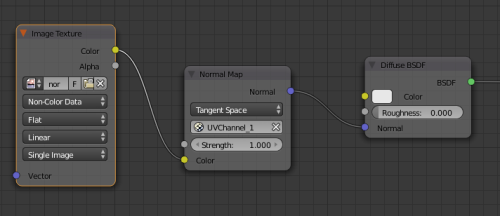
2) add the normal map as non-color texture (tangent space) and set it up like in the graph image. Note that for Cycles you don’t need to do normal map filtering, as path tracing should do that automatically for you (by taking more samples)
3) add diffuse texture
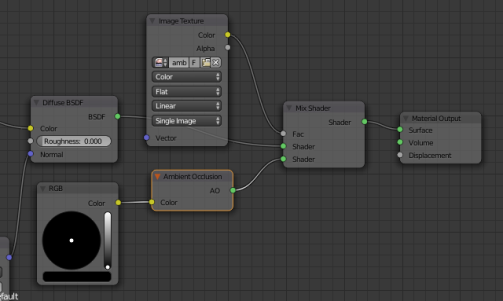
4) add ambient occlusion and mix it with the diffuse output. Note that it is possible to go without the AO, as the path tracer should do this anyways, but I included it to get the same look as in the original video/images.
5) mix diffuse with metalness to get proper diffuse colors. Perfectly specular materials should have their diffuse color set to zero. So high metalness should result in dark diffuse colors.
6) add specular shader
7) set up the normals for the specular shader
8) set up roughness for the specular shader with remapping. Note that you can remap the roughness to any range as needed, I used this range, as it looked mostly right.
9) set up specular color using the mask textures provided, I used this for reference: http://seblagarde.wordpress.com/2014/04/14/dontnod-physically-based-rendering-chart-for-unreal-engine-4/
10) mix with metalness to achieve dark specular in places specular shouldn’t be. I also hacked it a bit, so that the image is closer to the reference image.
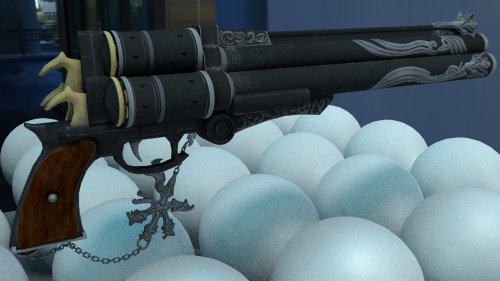
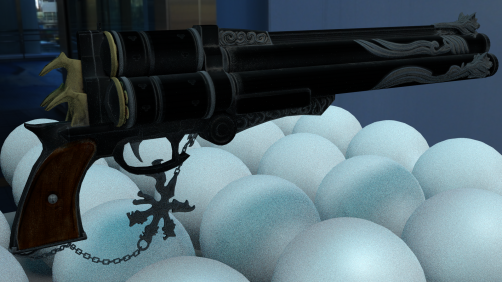
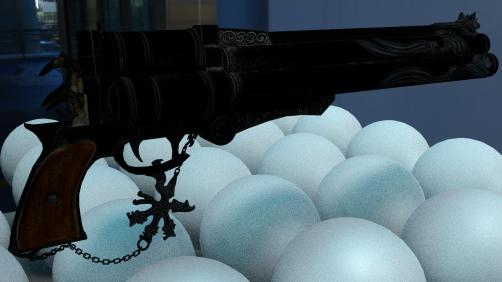
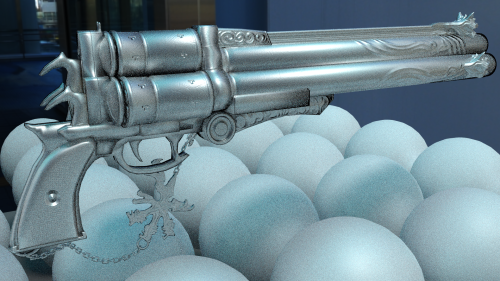
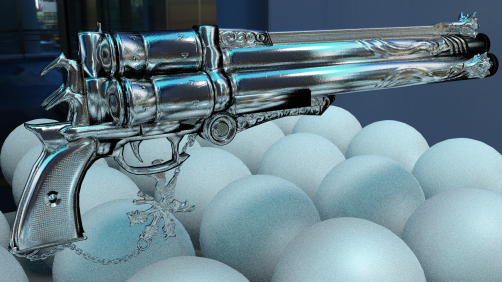
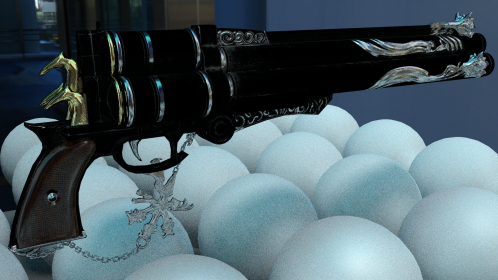
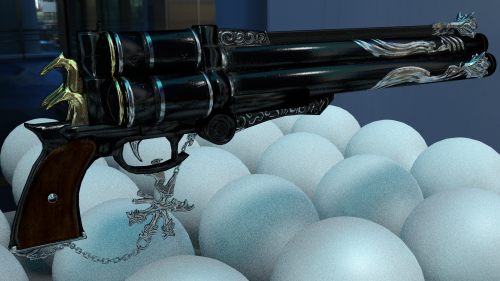
The End result
In conclusion, I think I got really close to the reference images. Of course different lighting will resulted in a different image, but this is one of the best things about PBR, no matter what lighting you use, it will always look good.
Note that with PBR I think there’s no “incorrect” material, it’s just different. So with different values you may get a plastic look instead of aluminium, but it will at least look like a nice plastic material.
Here are the final files (200MB):
https://drive.google.com/file/d/0B33Sh832pOdOODVPVUhKemlpdmM/edit?usp=sharing
Here’s a video that showcases the end result in motion.
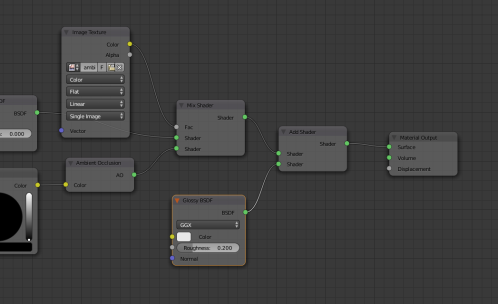

Should have a mix between diffuse and glossy controlled by a grayscale image texture set to data (no colorspace correction affecting it) input into the factor between the two. By adding glossy as it is now, the whole thing has the glossy applied as if it were a clearcoat. Unless that’s the desired effect, it needs to be mix controlled.
Then connect AO to a mix shader, but leave the other socket empty. Then add that to above. (Actual add shaders node this time.) Control the AO mix with null to help adjust how strong it is.
Also I tend to avoid the add shaders node unless I’m putting in another shader specifically for specular highlights (extra glossy/shiny stuff) or want a non-emissive shader to be brightened as if it were. The add shaders node really is additive, so mix is preferable otherwise.
The other stuff seems ok. I’m no self-proclaimed “expert” at this, but I’ve been at it for a while.
thanks, I’ll take a look at this clearcoat stuff!
I’m not quite sure about the ao part, it should darken the result, so why would you add it on top?
Hi Martin, Thx for this base shader. I was working on a version but was clearly lacking some RGB mix and mechanism. I found that your roughness entry was absolutely ineffective on the shader.
By trying some adjustments I found that if you link the roughness image map directly on the second Mix RGB node (you has actually 2 levels of Mix) the map become full effective.
Reblogged this on Blenderizad@.