extremeistan

thoughts about computer graphics, game engine programming

The Blog’s first birthday!

2015-04-15_1643

This blog is one years old (started on April 3rd), it’s grown incredibly fast, with over 12k views in a year. My twitter follower base has also grown significantly, with now ~250 followers.

Although lately I didn’t really have time to write any articles, I’m planning to write some about voxel rendering soon.

What do you think? What do you want to read about?

Thank you everyone! Have a nice day and stay tuned!

LGE source code released

Finally

So I decided on releasing the source code of the Linux Game Engine.

It reflects the state of the engine as seen in this video:

I also won’t be developing it further. The code is released under MIT licence.
I started developing this around 2010 and I learned to code while writing this
engine, so please bear with me, as some of the code might be old…
I’d probably write better code today.
I’m also working with some friends on a new version of this engine called Excessive Engine that is also open-source now on Github.

https://github.com/hsdxpro/Excessive-Team

I don’t have that much time though as I used to, so the development is really slow.

There are some issues that I didn’t bother to fix, like SSAO looks like it’s wrong,
but it isn’t it’s just the Sponza asset that has wrong normals (for some reason I
used the smooth function on it in Blender…).
Most of the GUI elements are also broken, they did work some time ago though.
I do recommend learning from the shaders, however the CPU side is really old in some
places, but there are some clever things there too. The general problem with it is
that the architecture is just really bad, and I also hardcoded a lot of things (I know).

here’s the code:

https://drive.google.com/file/d/0B33Sh832pOdOMFNXSmxUTWk2czQ/view?usp=sharing

Of course if you see your stuff mentioned in the readme file, then big thanks to you!

2014 in review

The WordPress.com stats helper monkeys prepared a 2014 annual report for this blog.

Here’s an excerpt:

The concert hall at the Sydney Opera House holds 2,700 people. This blog was viewed about 13,000 times in 2014. If it were a concert at Sydney Opera House, it would take about 5 sold-out performances for that many people to see it.

Click here to see the complete report.

Tweening and Easing

Tweening (inbe-tween-ing) is the process of generating intermediate states between a start state and an end state. For example, if you drop a ball it won’t immediately stop when it reaches the ground, but it will bounce some until it comes to rest. If you consider the ball’s Y axis position, you can establish a function that describes the ball’s motion from A (your hand) to B (the ground) as a function of time (x). Tweening functions usually take a value between 0 and 1, and output a value usually between 0 and 1.

Tweening functions

Tween on!

Types of tweens

There are three types of tween functions:

-in-tweens, that go slow first, then after about x=0.5 they quickly converge to 1.

-out-tweens, that behave the opposite way: move quickly until about x=0.5, then slowly converge to 1

-in-out-tweens, that combine the two: start slow, go fast at around x=0.5, then converge slowly to 1. We also establish a requirement that at x=0.5 f(x)=0.5 should hold.

Defining tween functions

Based on this, we can define the in-tween function as:

y = f(x)

To get the out-tween function from the in-tween, we need to start fast, so we’ll need to flip the time input (x = 1 – x), but this would result in starting with y=1, so we’ll need to flip the overall output too:

y = 1 – f(1 – x)

The in-out-tween function will be the combination of the in and out function, sort of stitching together the two functions at x=0.5.

If x<0.5 then we’ll need the in-tween function. However if we’d use it as-is, we wouldn’t get f(x)=0.5 at x=0.5. So we need to squeeze the function along the x axis, x = 2 * x, and we also need to halve the amplitude, so that at x=0.5 f(x)=0.5.

If x>=0.5 then we’ll need the out-function. Again, we’ll need to modify it to get the desired output: continuity at x=0.5, slow convergence to y=1. Therefore we need to start with x=0: x = x – 0.5, and again squeeze the function along the x axis: x = (x – 0.5) * 2. Then we need to halve the amplitude f(x) = f(x) * 0.5, and add 0.5 to it to have it start at 0.5.

Putting it together this is how the generic in-out function will look like:

if( x < 0.5 )
{
y = f( x * 2 ) * 0.5;
}
else
{
y = ( 1 – f( 1 – ((x – 0.5) * 2) ) ) * 0.5 + 0.5;
}

Using the generic tween definition to create tweening functions

We can start with a linear function:

f(x) = x

f(x) = x

Linear tween function

Then move to higher order functions, such as a quadratic one:

f(x) = x * x

f(x) = x * x

Quadratic tween function

Of course you can create the out and in-out versions of these using the definitions.

Quadratic out-function

Quadratic out-function

Quadratic in-out function

Quadratic in-out function

Note that you can also use generic splines and curves to create custom tween functions, but that’s a whole another story.

You can find lots of examples of these here: https://github.com/sole/tween.js

ps.: Happy holidays 🙂 Stay tuned in 2015.

Experimenting with Physically based rendering in Blender Cycles

Cycles should be OK? …

I’ve been thinking about experimenting with physically based rendering for a long time, but at first I didn’t want to write any code. So I turned to the Blender Cycles path tracer. Cycles is great because it should give the “ground truth” path traced solution, so later I can see how close I got to that. However, simply importing a model doesn’t give you nice results outright, you have to set up the materials. I also read a lot about PBR from mainly here: http://interplayoflight.wordpress.com/2013/12/30/readings-on-physically-based-rendering/

But where do I get PBR assets from?

Physically based rendering is great because it simpifies the asset creation process, and it makes it difficult for the artists to create unrealistic results. It is usually paired with a streamlined asset creation pipeline, with all the reference materials and the like.

But I don’t have these, so I set out to search for PBR assets that one can use without paying artists to create them.

I found this great gun asset here: http://artisaverb.info/PBT.html

I also used it as reference for rendering results.

There’s not much more assets around the web.

How to achieve fast, clean render output on AMD

Render settings tab:

Resolution: set to desired (1080p)

Sampling: branched path tracing, 4 AA, 8 diffuse, 6 glossy, 4 AO samples, rest is 1 sample (add more if needed)

Light paths: set max samples to 128 for each of them, min to 0

NO motion blur

Performance: dynamic BVH, cache, persistent spatial splits, 256×256 tiles, no progressive

World settings:

Set up an equirectangular background texture for the environment map at the world settings.
http://www.hdrlabs.com/sibl/archive.html

Use importance sampling here.

Lights:

Disable importance sampling for ALL your lights, as they cause “black lines” artifacts.

Cameras:

Use NO depth of field for the camera.

Memory considerations:

OpenCL allows up to 576MB of allocatable Buffer Size (clCreateBuffer) on my 1GB video card, so make sure you don’t go over that!
Reduce texture sizes if needed (I used 2k)


This made sure that on my HD 7770 I got around 40 second render time for a frame. However the image wasn’t at all noise-free. If I set the render settings to the “final” preset with “full global illumination” I got around 5-8 minutes of render time per frame.

With all these optimizations a 1.5 minute movie still took 2 days to render.


Steps to set up PBR in Blender Cycles

1) add a diffuse shader as seen on the graph image

diffuse_only

Diffuse only


Diffuse only graph

Shader Graph for diffuse

2) add the normal map as non-color texture (tangent space) and set it up like in the graph image. Note that for Cycles you don’t need to do normal map filtering, as path tracing should do that automatically for you (by taking more samples)

normal_mapping

Diffuse with normal mapping

normal_mapping_graph

Graph for diffuse and normal mapping


3) add diffuse texture

diffuse_normal

Diffuse texture with normal mapping

diffuse_normal_graph

Graph for diffuse texture and normal mapping

4) add ambient occlusion and mix it with the diffuse output. Note that it is possible to go without the AO, as the path tracer should do this anyways, but I included it to get the same look as in the original video/images.


Diffuse and Normal mixed with Ambient Occlusion

Diffuse and Normal mixed with Ambient Occlusion

Graph for diffuse normal ambient occlusion

Graph for diffuse normal ambient occlusion

5) mix diffuse with metalness to get proper diffuse colors. Perfectly specular materials should have their diffuse color set to zero. So high metalness should result in dark diffuse colors.

Diffuse combined with metalness

Diffuse combined with metalness

Graph for diffuse combined with ambient occlusion

Graph for diffuse combined with ambient occlusion

6) add specular shader

Diffuse shader with Specular added

Diffuse shader with Specular added

Graph for diffuse specular

Graph for diffuse specular

7) set up the normals for the specular shader

Diffuse + Specular + Normal mapping

Diffuse + Specular + Normal mapping

Graph for diffuse + specular + normal

Graph for diffuse + specular + normal

8) set up roughness for the specular shader with remapping. Note that you can remap the roughness to any range as needed, I used this range, as it looked mostly right.

Specular with roughness

Specular with roughness

Specular with roughness graph

Specular with roughness graph

9) set up specular color using the mask textures provided, I used this for reference: http://seblagarde.wordpress.com/2014/04/14/dontnod-physically-based-rendering-chart-for-unreal-engine-4/

Specular colors

Specular colors

Graph for specular color

Graph for specular color

10) mix with metalness to achieve dark specular in places specular shouldn’t be. I also hacked it a bit, so that the image is closer to the reference image.

Specular color mixed with metalness

Specular color mixed with metalness

Graph for Specular color combined  with metalness

Graph for Specular color combined with metalness

 The End result

In conclusion, I think I got really close to the reference images. Of course different lighting will resulted in a different image, but this is one of the best things about PBR, no matter what lighting you use, it will always look good.

Note that with PBR I think there’s no “incorrect” material, it’s just different. So with different values you may get a plastic look instead of aluminium, but it will at least look like a nice plastic material.

Here are the final files (200MB):

https://drive.google.com/file/d/0B33Sh832pOdOODVPVUhKemlpdmM/edit?usp=sharing

Here’s a video that showcases the end result in motion.

DX11 Catalyst Driver Performance over time

Something’s missing

So I’ve been looking around the internet for a post, or something in which I could see how the AMD and Nvidia drivers have improved over time. I definitely was certain that things like:

-they deliberately make the drivers worse so that you’d buy their new GPU

-the driver perf does NOT improve in real-world scenarios

are NOT true. From the OpenGL side I could already see that with each released AMD driver things get fixed, new features are implemented, and that is JUST the OpenGL backend. They have a huge variety of other things in the driver that are constantly improved. On the other hand it seems like compared to NVIDIA, they are always a step behind in supporting the latest OpenGL functionality.

I only have an AMD GPU right now that is capable of DX11, but I’ll soon grab an NVIDIA too, so that post will come later.

Benchmark

The Experiment

So I downloaded all of the WHQL drivers from AMD’s website back to 12.8 as that is supposed to be the first driver to support Windows 8.

I wanted to have a real-world benchmark program that showcases the improvement, so I browsed through my games in Steam, and found out that Metro: Last Light has a benchmark program that puts quite a stress on the system.

The PC I used for testing is the following:

-Core i5 4670 @3.4GHz

-HD 7770 GHz Edition 1GB GDDR5

-8GB 1600MHz RAM

The settings I used were the following:

-1280×720

-DX11

-Very High Quality

-4x AF

-NO PhysX

-Normal Tessellation

-Low Motion Blur

-NO SSAA

The Results

I started with the latest beta driver the 14.7 RC3. The overall experience was smooth animation, with FPS drops (to around 25FPS) in places where the GPU just didn’t suffice. I got 38.91 as the average FPS, which is 25.7 ms.

Then I wanted to compare with the oldest possible, the 12.8. This time the animation lagged a bit, or it was just not that smooth overall. The FPS drops were now more severe (to around 20FPS) and the overall framerate was just at least 5-10FPS less. I got 32.96 as the average FPS, which is 30.34ms.

I also tested the drivers in between the two extremes and I found that the average FPS improved ever so slightly with each release.

The minimum and maximum frame times varied a lot, there’s definitely no trend here.

The best driver for the minimum FPS was the 13.9, but this likely cost a bit on the max FPS side, as you can see the trend breaking after 13.4.

Here’s a chart that shows driver performance over time:

AMD Driver Performance over time

And here’s a GIF that shows the perf improvement of the entire frame sequence over time (not just min/max/avg):

AMD Driver perf over time


The Conclusion

So as you could see the driver performance did improve significantly (by 5 ms for the average frame time, which is HUGE) in 2 years. It is definitely worth upgrading your drivers to the latest WHQL version, as you’ll definitely get some small perf improvements and other goodies. The performance did improve in a real world scenario, so you can’t say that they’re only optimizing for 3DMark…

If you’d like to see the original result files, you can find them here:

https://drive.google.com/file/d/0B33Sh832pOdOU21QU3JhdERvRGc/edit?usp=sharing

Physically Based Camera Rendering

The need

With all the talk about Physically Based Rendering nowadays, it’s important to take a look at the abusive post-processing effects games use today to either enhance the image or mask artifacts and lack of detail. Therefore I think it is important to have a Physically Based Camera Rendering (PBCR) system in games, because to have an image that looks like as if it was taken from a movie, you have to look at it through some lenses.

The ingredients

Most (if not all) of today’s AAA games (and even some indie) feature high-quality post effects, such as Depth of Field, Motion Blur, Film Grain, (pseudo) Lens Flares, Bloom, Glare, Vignetting and Chromatic Aberration. Usually you can also adjust the Field of View of the camera you’re observing the world through, and sometimes this is a gameplay feature (think of the sniper rifles).

Of course all this requires a Gamma Correct High Dynamic Range rendering system to be working properly. Pair this with Physically Based Rendering, and you should get really realistic results.

Depth of Field

Depth of Field (or DOF) is an effect that simulates the out-of-focus (blurry) parts of the photographs. http://en.wikipedia.org/wiki/Depth_of_field

Depth of Field

Depth of Field

Bokeh Depth of Field refers to the various shapes that are formed when highlights are out-of-focus. This is in my opinion a pretty nice effect, but there are game styles where this is actually counter-productive (like FPSs).

[UPDATE] The Bokeh shape is directly affected by the aperture, as you can see here, on real world cameras you can even create custom shapes (so sprite based bokeh is not all bs), and with some clever blending between the shapes you can create dazzling eye-candy effects (who told you this can’t be a gameplay feature?).

On real world cameras you can control this effect by changing the point where you focus.

To add, you can change your f-stop (http://en.wikipedia.org/wiki/F-number) number (the diameter of your aperture). The bigger the f-stop is, the smaller the aperture diameter becomes, and therefore less light comes through there, so the image’s exposure should decrease. A high f-stop number also means that your camera will increasingly start to look like a pinhole camera (http://en.wikipedia.org/wiki/Pinhole_camera) and therefore more and more of the image should be in focus.

The f-stop number also depends on the focal length (http://en.wikipedia.org/wiki/Focal_length), and focal length directly affects your field-of-view (FOV).  Large focal lengths should mean small FOV values. The focal length is a parameter of your lenses, however this is why zoom lenses were invented, you can change the focal length, therefore you essentially zoom in on the image, your field of view becomes smaller, and also your depth of field becomes shallower (see, everything correlates).

There are numerous papers around the internet that discuss how to implement this technique efficiently:
http://dice.se/wp-content/uploads/BF3_NFS_WhiteBarreBrisebois_Siggraph2011.pdf

http://www.crytek.com/download/Sousa_Graphics_Gems_CryENGINE3.pdf

http://bartwronski.com/2014/04/07/bokeh-depth-of-field-going-insane-part-1/

Motion Blur

Motion Blur is an effect that simulates the streaking (or blurring) of objects moving relative to the camera either because of their speed, or the camera’s long exposure. http://en.wikipedia.org/wiki/Motion_blur
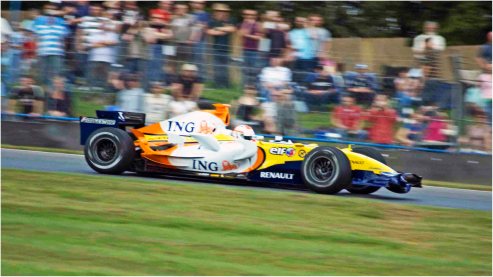
Motion Blur

Motion Blur

This effect is created because for that camera it actually takes time to record a frame, and in this time objects move, therefore they appear on more than one pixel of the image. Longer exposure times mean that it takes even longer for the camera to record a frame, so objects are more prone to appear blurry.

There are also numberous sources to learn from:
http://john-chapman-graphics.blogspot.hu/2013/01/what-is-motion-blur-motion-pictures-are.html

http://john-chapman-graphics.blogspot.hu/2013/01/what-is-motion-blur-motion-pictures-are.html

http://mynameismjp.wordpress.com/the-museum/samples-tutorials-tools/motion-blur-sample/

http://www.gamedev.net/page/community/iotd/index.html/_/hybrid-motion-blur-r321

Film Grain (or noise)

So, suppose you have a perfect image rendered using PBR, but it still doesn’t look right. You may be missing some noise. This dreaded artifact of path tracing systems is actually quite common in real-world screnarios (although it is way more subtle).

Film Grain

Film Grain

In real photographs the images may look noisy due to the fact that the surface that captures the light is actually somewhat sensitive to it. The sensitivity is determined by the ISO speed setting on your camera. Large ISO settings mean that the surface is really sensitive to the light, and therefore you can take a picture even at night, or in a dark room. This comes at a cost though, the image will get noisy.

Here’s a link on how to implement this:

http://devlog-martinsh.blogspot.hu/2013/05/image-imperfections-and-film-grain-post.html

Lens flares

Lens flares are again a nice artifact of real world camera systems. They are formed by light reflecting and scattering around in the lens system of a camera. Sci-fi games usually like to abuse this by putting it every-f-in-where, even if it totally shouldn’t be there. Even JJ Abrams would be jealous of some games. http://en.wikipedia.org/wiki/Lens_flare

Lens Flares

Lens Flares

A nice, natural looking lens flare effect though may add a lot to the realism of the scene.

Here’s some links on how to implement it:

http://john-chapman-graphics.blogspot.hu/2013/02/pseudo-lens-flare.html

http://resources.mpi-inf.mpg.de/lensflareRendering/

Bloom

Boom is an effect that produces fringes of light extending from the borders of bright areas in an image. The light kind of bleeds to the dark parts of the image. http://en.wikipedia.org/wiki/Bloom_(shader_effect)

Bloom

Bloom

Here’s some links on how to implement it:

https://de45xmedrsdbp.cloudfront.net/Resources/files/The_Technology_Behind_the_Elemental_Demo_16x9-1248544805.pdf

https://software.intel.com/en-us/articles/compute-shader-hdr-and-bloom
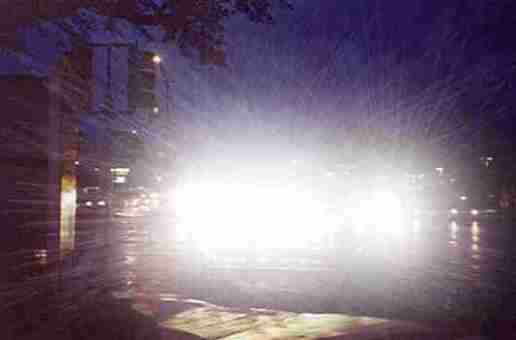
Glare

While bloom is an artifact of the camera lens system, glare is actually an artifact of your eyes’ lens system. While your eye can adopt to sudden light intensity changes pretty quickly, it’s still not perfect, and therefore you may experience difficulty seeing. http://en.wikipedia.org/wiki/Glare_(vision)

Glare

Glare

You can simulate this by implementing eye adoptation, which changes the exposure of the image over time based on the average luminance.

Here’s a paper on this:

http://resources.mpi-inf.mpg.de/hdr/peffects/krawczyk05sccg.pdf

Vignetting

Vignetting in real world camera systems is produced by the lenses blocking light from each other.  This also means that the amount of vignetting is dependent on the f-stop number (aperture). http://en.wikipedia.org/wiki/Vignetting

The bigger the f-stop number is, the smaller the aperture diameter will be, and therefore more vignetting will be visible.

Vignetting

Vignetting

Implementation:

http://devlog-martinsh.blogspot.hu/2011/12/glsl-depth-of-field-with-bokeh-v24.html

http://qctwit.blogspot.hu/2012/01/glsl-vignette-and-alpha.html

Chromatic aberration

Chromatic aberration is an effect when the lens system fails to focus all colors to the same place. This results in fringes where there are large light intensity differences in an image. http://en.wikipedia.org/wiki/Chromatic_aberration

So probably when you implement it you should experiment with luminance based edge detection filters, so that only the large contrast areas will be affected.

Chromatic Aberration

Chromatic Aberration

Implementation:

http://gamedev.stackexchange.com/questions/58408/how-would-you-implement-chromatic-aberration

Putting it all together

So after you’ve implemented all of these effects, it’s time to link the parameters together, so that all of them work in a system simulating an actual camera.

Here’s an impressive demo that showcases this:

http://dl8.me/camera/client/

Remember that sometimes less is more, most of these effect are normally really subtle, so make sure you don’t go overboard.

[UPDATE] Just a small addition to the implementation part: the rendering order matters. So, suppose you have your fully lit scene, along with subsurface scattering and reflections blended on top. Then you do these effects in the following order:

1) Depth of Field

2) Motion blur (note that you can do these independently and mix them later as shown here, but quality suffers a bit)

3) Bloom rendering (input: motion blur output)

The usual bright pass, etc. plus eye adoptation!
4) Lens flare rendering (input: bright pass output)

5)  Combine the output of the motion blur pass, lens flares, bloom. Do the vignetting here, on the combined color. Do tone mapping and gamma correction here on the vignetted color.

6) Render chromatic aberration and film grain here (so after tonemapping, in gamma space)

7) Post processing AA comes here (eg. SMAA)

If you still didn’t quite understand all the theory behind all this (especially the real world part), then I recommend you read through this website:

http://www.cambridgeincolour.com/learn-photography-concepts.htm

OpenGL browser GUI lib

While I was working on other things I decided to create a UI for it.

I also wanted it to be quick and easy, so I took my already existing berkelium wrapper implementation and created this simple lib. With this you can easily add a UI to your OpenGL application. You can design the UI in a webpage designer application and hook up the js-cpp communication later. You can also implement a dummy cpp implementation in js for more complex projects, so that you can quickly prototype/develop/debug your webpage even in your browser!

So to sum it up:

  • -fast development
  • -easy to use
  • -develop the UI in your browser, hook up the cpp-js code later
  • -design the UI in a webpage designer application
  • -youtube support
  • -webgl support
  • -cross platform

check it out here:

https://github.com/Yours3lf/gl_browser_gui

The Flow

Introduction

Some would be surprised to hear that programmers actually love their job (or at least most of them). This however, is not due to one being workaholic, but an extremely liberating experience called: The Flow.

Their job may seem uninteresting sitting in an office forty hours a week, especially compared to other jobs that includes exotic travelling dealing with people and other hyped activities, but because of the flow this job will be one that a programmer really loves and most people would really love to have.

Are you ready?

What is the flow?

The flow is an experience in which we completely submit ourselves to an activity. It is fulfilling and essential to leading a happy lifestyle. It is an experience in which we fall into trance and time just flies away. It is the very reason you may not notice that you spent eight hours at the office, or that it’s five am already, and the sun is coming up.

The ultimate experience

So why is all this important?

Being a programmer usually requires you to be a creative problem solver forty hours a week. This looks like a rather impossible task, because while creativity may be encouraged, it cannot usually be induced, “it just happens”. Programmers can tackle this problem by making sure that they are in the flow.

One will never be a great programmer, nor will he write great code without mastering the flow. Usually without it you are just frustrated by the complexity of the code, and can’t get any work done. However when in the flow, you just don’t notice the complexity because it becomes part of the task that you realize how to solve it, you just “know” how to get to the solution, or at least know how to find it.

flow-chart

Challenge vs skills

This is the very reason why it is terrible to ever interrupt a programmer with anything when he has the headphones on, and is visibly working. It is really important that the task he solves isn’t too hard, because it will break the flow, and it isn’t too easy because that will lead to one being uninterested and distractions. It is also important that when you reach a part when you can’t proceed, because you encountered a problem that you don’t know how to tackle, that you do know where to look for help in order to get going again. A seamless helping hand will not break the flow, it will be part of the solution. This is why an old Google account is really helpful, because it is “trained” to know what you are looking for. It gets the results you want in less than a second and because of the short time it takes to get going again, your flow won’t get broken.

The flow can be really addictive as it’s one of the few components that are really needed to lead a happy lifestyle. If you’re a programmer you should try not touching your computer or phone or any other electronic device for a week. You’ll go mad. You’ve just lost one essential component of your life and you won’t know what to do anymore (maybe get back to programming?).

There are some people who just seem like they were born to be problem solvers. They are actually 2.5% of the population who have this personality type, and essentially they are the people who would make a great programmer. In addition, the reason we have so few girls in the industry is that only 0.5% of the girls have this personality type, plus the culture doesn’t really help much either.

How can you help yourself get into the trance like flow state?

Music really helps a lot. Some would be surprised (again?) that the very music you hear in clubs and other venues is actually really helpful to becoming a great programmer. The genres that may help you get into the flow are most electronic music like electro, trance, psychedelic trance, dance, house, drum and bass, dubstep and trap. Your exact selection of music may vary but essentially the key is repetitiveness and seamless long mixes. Therefore you should look for mixes of any of these genres (maybe experiment a bit?) that are something like two hours long. A good mix is never interrupted, the tracks follow each other seamlessly and there are no huge changes in the tracks.

Some old video games were also really great at inducing a flow state, because you were given a clear task that was tweaked carefully to make sure that it is not too easy or too difficult. To add they usually solved the problem of failure by giving you yet another chance and helping you get to the solution easily without breaking your immersion (or flow?).

A modern wizard?

Programmers may seem like the wizards of the 21st century. They create miraculous things from nothing that have a background that usually no one understands but them. They have skills that seem inhumane when compared to others. The flow adds a lot to this image as programmers now suddenly do things in a trance state induced by rhythmic, repetitive music often filled with lots of drums. Kind of like a tribal ceremony. They also seem really mentally exhausted after such a journey in the “other world”.

Realtime Global Illumination techniques collection

What does this list contain?

So I decided to do a little research on realtime (mostly) global illumination techniques, and compile a little list here.

If you have any suggestions, or any techniques that I may have missed please let me know.

Note that I deliberately excluded path tracing, ray tracing or photon mapping based techniques.

Also I’ll try to focus on techniques that allow dynamic scene AND dynamic lighting in realtime.

Realtime should mean at least 30 fps on the latest hardware in 1080p.

Voxel Cone Tracing Global Illumination

Voxel Cone Tracing Global Illumination

Reflective Shadow Maps

Original paper: http://www.vis.uni-stuttgart.de/~dachsbcn/download/rsm.pdf

Splatting version: http://www.vis.uni-stuttgart.de/~dachsbcn/download/sii.pdf

Multiresolution splatting version (from GPU pro): http://homepage.cs.uiowa.edu/~cwyman/publications/files/multiResSplat4Indirect/multiResolutionSplatting.pdf

Paper on optimization: http://cgg.mff.cuni.cz/~jaroslav/papers/mlcourse2012/mlcourse2012%20-%2005%20-%20dachsbacher_notes.pdf

Clustering: http://cg.ivd.kit.edu/publications/2012/RSMC/RSMC.pdf

http://cg.ivd.kit.edu/downloads/i3d2011ssbc.pdf

Clustered visibility: http://www.mpi-inf.mpg.de/~ritschel/Papers/ClusteredVisibility.pdf

A demo: http://www.nichego-novogo.net/temp/RSM1.rar

Several techniques (rsm, lpv, voxel gi): http://www.tobias-franke.eu/?dev

Voxel Cone Tracing

Original papers:

[FIXED] https://research.nvidia.com/publication/interactive-indirect-illumination-using-voxel-cone-tracing

[FIXED] http://www.icare3d.org/research-cat/publications/gigavoxels-a-voxel-based-rendering-pipeline-for-efficient-exploration-of-large-and-detailed-scenes.html

Additional papers:

http://www.seas.upenn.edu/~pcozzi/OpenGLInsights/OpenGLInsights-SparseVoxelization.pdf

http://on-demand.gputechconf.com/gtc/2012/presentations/S0610-GTC2012-Octree-Voxelization-Global.pdf

http://on-demand.gputechconf.com/gtc/2014/presentations/S4552-rt-voxel-based-global-illumination-gpus.pdf

[UPDATED] http://fumufumu.q-games.com/archives/Cascaded_Voxel_Cone_Tracing_final_speaker_notes.pdf

Demo with source: https://github.com/domme/VoxelConeTracing

http://www.geeks3d.com/20121214/voxel-cone-tracing-global-illumination-in-opengl-4-3/

Video: http://vimeo.com/75698788

http://www.youtube.com/watch?v=SUiUlRojBpM

Blog post(s) about it: http://realtimevoxels.blogspot.hu/

http://www.altdevblogaday.com/2013/01/31/implementing-voxel-cone-tracing/

Layered Reflective Shadow Maps

[UPDATE] Original paper and video: https://software.intel.com/en-us/articles/layered-reflective-shadow-maps-for-voxel-based-indirect-illumination

Note: this is a similar technique to voxel cone tracing, quality is similar, performance seems to be worse overall, but I think there’s room for more tricks… Oh, and surprisingly it runs on an Intel Iris pro (at 200ms 🙂 )

Light propagation volumes

Original papers:

http://www.crytek.com/download/Light_Propagation_Volumes.pdf

Cascaded;

http://www.crytek.com/cryengine/cryengine3/presentations/cascaded-light-propagation-volumes-for-real-time-indirect-illumination

http://www.vis.uni-stuttgart.de/~dachsbcn/download/lpv.pdf

http://www.crytek.com/download/2010-I3D_CLPV.ppt

VPL based: http://web.cs.wpi.edu/~emmanuel/courses/cs563/S12/slides/cs563_xin_wang_lpv_wk7_p2.pdf

Octree: http://www.jiddo.net/index.php/projects/other-projects/80-thesis-octree-lpv

Demos:

http://www.rafwrobel.com/lpv/lpv.zip

http://3d.benjamin-thaut.de/Files/file.php?id=8

http://blog.blackhc.net/wp-content/uploads/2010/07/LPVPrototype.zip

+ there’s a sample in the nvidia DX11 sdk

Videos:

http://www.youtube.com/watch?v=vPQ3BbuYVh8

In Fable Legends: http://www.lionhead.com/blog/2014/april/17/dynamic-global-illumination-in-fable-legends/

SSDO

Original paper: http://www.mpi-inf.mpg.de/~ritschel/Papers/SSDO.pdf

Deferred: http://kayru.org/articles/dssdo/

Note that this is not really a GI solution rather a local GI solution where local means that it works well on small details, but it fails to grab the whole picture…

Deferred radiance transfer volumes

Original paper: http://www.gdcvault.com/play/1015326/Deferred-Radiance-Transfer-Volumes-Global

Demo at: http://codeflow.org/entries/2012/aug/25/webgl-deferred-irradiance-volumes/

Radiance hints method

Original paper: http://graphics.cs.aueb.gr/graphics/docs/papers/RadianceHintsPreprint.pdf

[FIXED] playable at: http://tesseract.gg/